Monday, 28 March 2011

Side Easel Circle Girl

I wanted to make something different for a little girl who's going to be 1 next month.  I've used the circle girl set from theclipartfairy but I made it up as a big side easel card.  It is about the size of a small dinner plate, but oval in shape.

I decoupaged the little girl (3layers), but it doesn't show up on the pics, sadly.  I've added the words to the inner circle of the card and glamour dusted.  I added little gems to the centres of some of the flowers and a tiny heart button to the dot on the "i", this was off a card that I bought to cut up to use the pieces because it had some lovely little diamante bits and buttons on it.


This is such a cute little girl with the little bird on her lovely hat.  There are 4 layers to her little dress but it doesn't show up, I used photo paper for her clothes and gives a lovely shine.
I am really pleased with the result and hope the little girls family will be also.

Thursday, 24 March 2011

Big flowers side easel

I've made this lovely bright and clean card from a set from theclipartfairy.  I wanted  to try printing onto photo paper to give a nice shiny card surface..... I think this has printed to a high quality on Polaroid photo paper which I bought at £1 for 12 sheets - this I think is excellent value.

I've added a little pink bow to the main easel, the flowers have been layered using silicone glue to give some dimension. To the base I've added a die cut sentiment and a flower with ladybird which I think finishes off the card nicely. I've not used any glamour dust as I don't think it's necessary on this card.

baby boy Christening card

Just a small clean and simple card for a little boy's Christening.  Made using alpha graphics from theclipartfairy, they are part of a set that makes up a wordbook and I use this set (and the pink set) all the time.
All I've added to this is some tiny white bows on twine and a tiny blue heart button from my stash.

Monday, 21 March 2011

Keepsake Box For Steph


This is the second of my treasure boxes (I've got another two, at least) I've got to make.  This is for my youngest daughter, Stephanie.  Unlike the first one, I've made the frame as a run-out (slightly bigger than the box front), this gives me more space to play with for adding graphics etc.
I've used the frame (adjusted colour to suit) from theclipartfairy, double layered to add depth, the lettering is from Polkadoodles Sugar Birdies Collectors Edition, as is the flowers and sentiment (to which I added the wording).
I've added a little wooden butterfly (from my stash) to the sentiment. It has a lovely antique gilded finish that doesn't show up that well on the pic.

And to the centre of the flowers, I've added some little antique pearl brads.  I've sprayed all with Crafters Companion Spray and Shine (instead of using nailvarnish), it gives a lovely sheen to decoupage and is easier to apply than varnish, just two sprays (15minutes apart) and it dries in half an hour.  I am very pleased with the finished result and hope Stephanie will be too.

Monday, 14 March 2011

Word Books

I made two baby word books this weekend from kits by theclipartfairy.  To the words I've added little buttons and bows from stash and heart pins same.  I've glamour dusted the letters and the finished result I'm more than pleased with.
The little girl angel graphic is from the Lurvlee range by theclipartfairy and has a complete range of co-ordinating graphics and backing papers.

Friday, 11 March 2011

Easel shaper for Nan

I needed an 80th birthday card for a Nan (who's a young 80yrs), thought this one would be ok.  I used the easel shaper and the country chic alphabet from theclipartfairy.  I decoupaged the N and n to give added dimension.  Added a big glittery butterfly from my stash (but the background colour didn't match) so made my own from bp from the fairy again by cutting around original "peach coloured" one.

I added little pink sequins to bottom corners and finished off by making a box (instead of envelope) to put it in, using the same raspberry coloured bp as butterfly, to the box lid I also added in same country chic alphas, the numbers 80.

I'm pleased with the result and hope the recipient will be too.

Wednesday, 9 March 2011

Secret Box

I bought some of these plain pink boxes from my local craft shop with the intention of creating some keepsake boxes for my grandchildren.  This is the first one I've "customised", it's for my youngest granddaughter, Isabella, and I'm going to fill with little items of jewellery for her as a present for her for when her Mummy goes into hospital to have her baby sister (due end of June).

I've decorated this one with frame and image from  theclipartfairy.  These were printed onto pearlised white card, I decoupaged both the frame and the little girl graphic.  I added my granddaughter's name to the frame, made a nice white bow for the top, to which I've added a big sparkly pink butterfly from my stash (bargain buy) which I have in several colours.  I also added some clear varnish to the girl graphic to give extra sheen.


The box looks just line any other box . . . until you open the lid to reveal storage, and under the flap you see a little ribbon pull . . . that opens up a "secret" drawer.  You could add jewellery as I am doing with this one, or some choccies for a "chocoholic" or even another of my ideas for my daughters for when they go into hospital . . . is pamper goodies (eye mask, face pack sachets, tissues, nail file etc.)

Once I've decorated another one of these little "treasure boxes" I'll post.


Tuesday, 8 March 2011

Sam's 16th

I was asked today if I would put together a card for a 16th birthday and the only guide I had was that it should have Daughter and 16 in there and that it had to be BIG.....  This card actually stands 10" tall and is 8" wide.  I think this fits the bill, don't you.

I've used "Dolly Mixtures" easel shaper as the base (from theclipartfairy) also the young lady graphic is also from Wendy, doesn't she look great.  I love the colours of this card, blue and chocolate brown go so well together. 


I've glamour dusted the edges of the shaper, wording and elements on the decoupage (3layers on the graphic) to add dimension.  Also added the chocolate brown glittery bow and added a little silver butterfly charm on lovely blue ribbon.

Monday, 7 March 2011

Easter Owls

Card made with my newest Polkadoodles cd - Sugar Birdies.  Anyone who knows me knows that I'm mad about Owls in any shape or form and I just adore these little cuties.  I actually wanted the cd just because it had these owls (and others like them) on it.  I guess I'm totally into nature, cos as well as owls, my other passion is robins and hedgehogs (yet to find cute graphics for latter two tho!).  In fact, I like all things nature/outdoors. I know that you can get some really lovely hedgehog stamps, but at the minute stampings not my thing.

The bp's I've used on this card are also from the cd and the colours of lime and tangerine work really well don't you think.  I added a sentiment "Happy Easter" to the box lid of the largest owl so instead of Easter chicks and bunnies, we have Easter Owlets :)

Card for Twins

Just a quick card today........ that I made for someone who's just had identical twin girls.  I've used, as always, a lovely fairy graphic and heart graphic from theclipartfairy.  I've enlarged the heart and glued it to the front of this triple fold card blank (one from a pack of 50 pastel coloured blanks and envelopes) that were another bargain at only 99p, yes you did see correct, 99p for all 50 including the envelopes.  I've had them for quite a while and didn't know how to use them as I normally make big cards.  I think that they are ideal for this type of card.

I decoupaged the little angels, added liberal sprinklings of glamour dust and added border peel-offs to finish off the edges.  All in all it only took me about 1hour to make this, which is quick for me as I usually spend a couple of hours at least on one card from start to finish.  A pleasing little card I think.

Saturday, 5 March 2011

Wise Owl

This cute pink lady owl was made up from Polkadoodles Paperboutique I,and can be made in either A4,A5 or A6 size, this one was made in A5.  I've decoupaged as per instructions and added my own touch as follows.
I used glamour dust on the flower, added a stick on gem for the beak, used gold embossing powder for the speckles and pink flower soft flocking for the wings (feels lovely and soft).  I finished off the base with a "with love" peel-off and corner edgings.  I think she's cute, don't you?

Friday, 4 March 2011

Card for Jack

I've used theclipartfairy Linen Wordbook kit to create this gorgeous card for a newborn baby, Jack. As always I've used glamour dust around the edges of pages and the lettering. I've added shine to the teddy bear with clear nailvarnish, attached the pages together with two little diamante brads (Hobbycraft bargains) and to finish, I've used a poundshop bargain - the lovely white "Baby Boy" ribbon bow.
I forgot to take a pic of the back of this card, but I printed off on the pc a page using the little bear graphic and the J............... and used the wording   J is for . . . Jack, a beautiful baby boy.

Black Bikini Card

This is the same card as the red one I posted a few days ago, only I've used my cuttlebug to emboss the card for the "bra and pants" to give some texture.  Used the peel-offs to create neclace and little jewel peel-off to front.
The use of the cuttlebug to give texture works well with this "cheeky" card. 

Thursday, 3 March 2011

Cool Dude Card

I thought I'd have a change from making girlie cards tonight and came up with this "cool dude".  It's a big 8" x 8" square card made from some really rich chocolate brown linen cardstock from the Papermill Shop, teamed with the spotty printed (snakeskin) paper from same Papermill.  This has a lovely snakeskin finish but I wanted spots so overprinted to get the result I was after. Unfortunately you cannot see this texture on the pic, but believe me it is fab.

I've used the image and frame from theclipartfairy and added a small amount of glamour dust to edge of frame and wording.  I've also added some sheer brown ribbon to top of frame, which finishes the card of perfectly.  I absolutely love chocolate brown and would like to make a card in same colour but add some lovely duckegg blue to the mix (another of my fave colours).

Tatty Teddy Easel

I used  theclipartfairy easel shapers to make up this simple and quick card, but instead of making it up as traditional easel, I just used the shapers then added a tent fold card to the back so it will stand alone.  The image is a gorgeous Tatty Teddy I've cut and decoupaged onto easel, added glamour dust to the rain drops and computer generated the sentiment.  A lovely clean card I think, and so simple.

Bikini card

I made this "cheeky" card after I got the idea from another Blogger......... Kath and her fantastic inspiration.  I used white linen card for the base, used my compass to create the "bra top", cut strips of red card for the straps (with shaped edge scissors), added a little black bow and pearl and peel offs to create a neclace.  The reverse of the card (which I haven't photographed) is made up to appear as bikini bottoms.  A great fun card for someone with a cheeky sense of humor.  I've also made up a black one, and used the cuttlebug to emboss, I'll publish that one later on today so come back and have a peek.

Wednesday, 2 March 2011

"Red Card"

This picture really doesn't do this card justice at all ....... it looks more orange in the pic than the lovely cherry red it actually is.  I've made it up from Polkadoodles Sundae of Seasons cd rom (spring section).  I thought it would make a lovely birthday card for an April (showers) birthday.  I've used some lovely cherry red card from The Papermill Shop, printed off a lovely red polka dot paper from the cd, along with the little red wellies and cute red umbrella.

The lovely red ribbon was a cheap buy from Hobbycraft (3 rolls, red, green and gold) for 29p.  I've added silver peel-off trim to the matting and layering to finish off the edges (I think this adds dimension).  As usual, I've clear varnished the trimmings to give a lovely sheen.  Unusual for me though with this card, I've not added any glamour dust as I didn't think it was needed.

Card for Grace

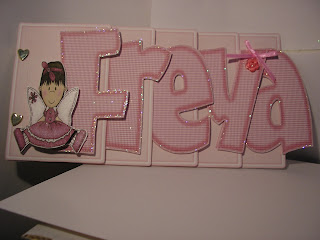
I love making baby/little girl cards and have been playing with graphics over the past couple of days to create some samples.  This one is made with a kit from  theclipartfairy (Pink Gingham Wordbook).  The kit contains the ready to print pages, also the png's and alphas in both lower and upper case, from this you can create any name up to 5 letters.  Also in the kit is the little doll graphic shown close up below.
I've decoupaged the alphabet and glamour dusted liberally to give a lovely glittery edge to the letters (this pic really picks up the glamour dust detail).  To keep the pages together I've used little "diamond" brads, another Hobbycraft bargain at 29p for 50..... wow!!!